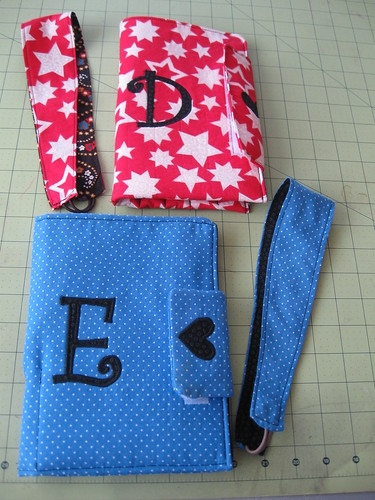
Note-Taker to fit 5"w x 8"h notepads
1. -Cut 1 outer fabric, 1 lining fabric, 1 interfacing at 13"h x 13"w for main case
- Cut 2 outer fabrics, 1 interfacing at 4h" x 3"w for flap closure
2. Iron on or baste interfacing to main fabric of case and flap. Add trims or applique if desired. Add velcro to the flap and outer fabric (place about 2" down and 1" in from right side edge of outer fabric.)
3. Place main fabrics of flap right sides together and sew around both short ends and one long end. Turn and press. Pin finished flap about 2" down from top edge of right side of your outer fabric. Match up unfinished edges of flap and the outer fabric.
4. Place lining fabric on top of outer fabric & flap with right sides together and sew around edges with 1/4" seam, leaving about 4" open to turn.
5. Trim corners, turn right side out and press. Fold up your bottom edge by 4", pin and sew around all edges to secure bottom pocket and topstitch the edge.
6. Find center of the pocket. To the right of center, mark lines on pocket about 1" apart for pencil pockets. Sew down these lines, backstitching at top and bottom.
7. Insert your 5" x 8" note pad, pencils & enjoy!
Do not attempt this on little sleep at midnight! I sewed the pencil pockets on the side of my embroidery the first time! Thankfully, I have a close, friendly relationship with my trusty seam-ripper.
I also included a reversible matching headband. There are dozens of free headband tutorials out there...
JezzePrints Flat pattern hair band,
Cakies Braided headband,
Zakka Life's Recycled T-shirt Headband,
Heather Bailey's Headband,
The Long Thread (like mine above) Reversible Headband.
I'd love to see pictures if you try this mini-tute!


1 comment:
Great project... can I pin this on Pinterest? shuttermom77@gmail.com
Post a Comment